Tips for Capturing Great Photographs: Taking Advantage of Natural Light


Photography is a wonderful art that enables us to capture the world around us in a way that speaks volumes about our perspective and experiences. But, in order to capture great photographs that inspire and move people, you need to have the right techniques and tricks up your sleeve. One such vital technique is taking advantage of natural light.


Natural light can be your greatest ally when it comes to capturing stunning photographs. Whether it’s early morning sunlight, golden hour light, or the soft glow of a sunset, natural light provides endless opportunities to capture photographs that are vibrant and full of life. Here are some tips to help you make the most of natural light in your photography:


1. Know the Types of Natural Light


Natural light comes in various forms. Understanding the different types of natural light and how they behave can help you make the most of each situation. Morning light is cool and blue, while sunlight during the day is bright and harsh. Golden hour light is warm and diffused, while twilight light is soft and moody. Knowing how each type of natural light affects your subject and surroundings is essential.


2. Use Reflected Light


Using reflected light is a great way to soften harsh sunlight and create a more even light source. This can be done by using reflectors or by positioning your subject in a location where the light reflects off a surface, such as a white wall or the ground.


3. Position Your Subject Wisely


Where you position your subject in relation to the natural light source plays a crucial role in capturing great photographs. Experiment with the lighting angle by adjusting the position of your subject, or by moving yourself around to change the perspective of the shot.


4. Avoid Direct Sunlight


Direct sunlight can be harsh and create unwanted shadows and highlights on your subject. Try to avoid shooting during periods of intense sunlight and, when you do shoot in bright sunlight, look for shaded areas that create a more diffused light source.


5. Capture Sunsets and Sunrises


Sunrise and sunset offer some of the most beautiful natural light for photography. This type of light is soft, warm and diffused, providing great opportunities for capturing stunning photos.


6. Shoot During Overcast Days


Overcast days may seem dull, but they provide some of the most even and diffused natural lighting for photography. Shooting during an overcast day allows for even lighting that can be used to create moody and emotive shots.


Capturing great photographs takes practice and learning how to take advantage of natural light is an essential step. By understanding the different types of natural light, using reflected light, positioning your subject wisely, avoiding direct sunlight, capturing sunsets and sunrises, and shooting during overcast days, you can create stunning and memorable photos that capture the beauty of the world around you. So grab your camera and get shooting. Your best shot is just a click away!


see all posts!

Title: Tips for Capturing Great Photographs – Mastering Editing Techniques


Photography is an art that requires skill, patience, and practice. Taking perfect shots can enhance the beauty of even the most mundane of subjects. With digital photography, the process has become faster and more accessible to everyone than ever before. However, capturing a great photograph requires more than just a push of a button. It requires an understanding of composition, lighting, and editing techniques, among other things.


In this blog, we will discuss some Tips for Capturing Great Photographs and delve into Editing Techniques that you can use to enhance your pictures.


Tips for Capturing Great Photographs


1. Pick the right time and place: Some of the best photographs are taken during sunrise or sunset, where the lighting is softer, and the colors are more vibrant. Also, consider the location where you are capturing your photographs, as the background and setting can affect the overall image.


2. Get creative with composition: Play around with composition to create some unique and compelling photographs. Try foregrounding, framing or using leading lines to draw the viewer’s attention to the subject. Look for patterns, symmetry, and contrast to add interest to your shots.


3. Understand the basics of exposure: Understanding the basics of exposure is essential in creating great photographs. The three elements used in exposure are aperture, shutter speed, and ISO. Learn how to balance these to create the perfect exposure.


4. Use a tripod: A tripod can be a valuable tool in photography. It helps to minimize camera shake, allowing you to take sharper shots. This is especially important if you are shooting in low light conditions.


Editing Techniques


1. Crop and Straighten: Cropping helps to remove unwanted elements from the photograph and also helps to adjust the composition. Straightening a tilted image can make it look more balanced.


2. Adjust Exposure: Adjusting the exposure can help to bring out highlights or shadows in your images. It can also help correct any underexposure or overexposure issues.


3. Color Correction: Color correction can help to balance the colors in an image, remove unwanted color casts, and enhance the saturation of colors.


4. Sharpening: Sharpening can bring out the details of the photograph, making it look crisper and more clear.


5. Filter Effects: Filters can give your photographs a particular look or feel by enhancing or muting specific colors.


Conclusion


Photography is an art that requires practice, patience, and skill. By following these Tips for Capturing Great Photographs and mastering these Editing Techniques, you can achieve your desired results in your photography. Remember, it’s not just about capturing the perfect shot but also about enhancing it to bring out its full potential. Experimenting and trying new things can lead to fantastic results, so don’t be afraid to push your skills and explore your creativity.


see all posts!

Tips for Capturing Great Photographs: Using Filters


Are you tired of capturing mediocre photographs? Do you want to know how to capture great photographs that will leave people in awe? One of the most important aspects of capturing great photographs is using filters. Filters can significantly enhance the aesthetics of your photographs and give them a unique touch. In this article, we will provide tips on how to use filters to capture great photographs.


1. Polarizer filter


A polarizer filter is a must-have for landscape photographers. It reduces glare and reflections, enhances colors, and makes the sky appear bluer. To use a polarizer filter, adjust the angle of the filter until you see the desired effect.


2. Neutral density filter


A neutral density filter reduces the amount of light that enters the camera. This filter is useful when you want to use a longer exposure or a wider aperture in bright daylight conditions. It also helps control the amount of motion blur in your photographs. There are different levels of neutral density filters, so be sure to choose the right one for your needs.


3. Graduated neutral density filter


A graduated neutral density filter is used to balance the exposure between the sky and the foreground. If the sky is too bright, the foreground will be underexposed. If the foreground is properly exposed, the sky will be overexposed. To use a graduated neutral density filter, position the dark portion of the filter over the sky and the clear portion over the foreground.


4. Color filter


Color filters add a color cast to your photographs. They are commonly used in black and white photography to change the tone of the image. For example, a red filter makes the sky appear darker and enhances the contrast in clouds. In color photography, color filters are used to enhance the natural colors in the scene.


5. UV filter


A UV filter is used to protect the lens from scratches and dust. It also reduces haze and improves the color accuracy of your photographs. However, be aware that some photographers claim that a UV filter affects the image quality and sharpness.


In conclusion, filters are essential tools for capturing great photographs. They enhance the aesthetics of your photographs and give them a unique touch. The five filters discussed in this article are the polarizer filter, neutral density filter, graduated neutral density filter, color filter, and UV filter. With these tips in mind, you are well on your way to capturing great photographs that will leave people in awe.


see all posts!

Tips for Capturing Great Photographs: Choosing the Right Shutter Speed


Taking a great photograph involves more than just pointing a camera at a subject and pressing the shutter button. There are various elements to consider, such as lighting, composition, and most importantly, the shutter speed. In photography, shutter speed refers to the amount of time the shutter remains open when taking a photo.


Choosing the right shutter speed can have a significant impact on the quality of your photographs. Below are some useful tips on how to choose the right shutter speed for your photographs:


Understanding Shutter Speed


Before discussing how to choose the right shutter speed, it is crucial to understand what shutter speed means. Shutter speed is measured in seconds or fractions of a second. A fast shutter speed like 1/4000th of a second means the camera’s shutter is only open for a very brief moment, while a slower speed like 1/15th of a second means the shutter remains open for a more extended period.


Shutter Speed and Movement


One of the primary factors to consider when choosing the right shutter speed is movement. The faster the subject is moving, the faster the shutter speed should be. If the shutter speed is too slow, the image will be blurry. For example, when photographing a sporting event or a moving vehicle, a fast shutter speed of at least 1/1000th of a second is recommended to freeze the motion.


On the other hand, slower shutter speeds like 1/60th of a second or slower can create a motion blur effect that can be useful in creative photography. You can experiment with different shutter speeds to create interesting effects depending on the type of subject.


Shutter Speed and Lighting


The amount of light present in the scene is another crucial factor when choosing the right shutter speed. In low light situations, you need to use a slower shutter speed to allow more light into the sensor. However, a slow shutter speed can introduce camera shake, which can result in a blurry image. Using a tripod or stabilizer can ensure steady camera movement, even when using a slow shutter speed.


In bright light situations, a fast shutter speed is necessary to reduce the amount of light entering the camera. For example, in portrait photography, a fast shutter speed is useful to avoid overexposure or to capture sharp images of moving people.


Final Thoughts


Choosing the right shutter speed is an essential part of capturing great photographs. The right shutter speed can help you freeze motion or create a blur effect, depending on what you want to achieve with your images. Understanding shutter speed and how it interacts with movement and lighting can help you make the right decision when taking photographs.


Remember to experiment with different shutter speeds and to pay attention to the results to see which works best for your subject and the lighting conditions. With time and practice, you can master this element of photography and take stunning images that will amaze your audience.


see all posts!

Title: Tips for Capturing Great Photographs: Understanding Exposure and Aperture


Photography is an art that allows you to showcase beautiful moments and tell stories through images. However, capturing great photographs requires more than just a good camera; it also requires an understanding of the technical aspects involved. In this article, we will discuss one of the key concepts in photography: exposure and aperture.


Understanding Exposure

Exposure is the term used to describe the amount of light that enters the camera and reaches the image sensor. This determines how bright or dark a photograph will be. It is affected by three main factors: aperture, shutter speed, and ISO.


Aperture refers to the size of the opening in the camera lens that allows light to enter. It is measured in f-stops, indicated by the “f/” symbol. A smaller f-stop (e.g., f/2.8) means a larger aperture opening, allowing more light to enter the camera. Conversely, a larger f-stop (e.g., f/22) means a smaller aperture opening, resulting in less light entering the camera.


A wider aperture (smaller f-stop number) is useful when you want to create a shallow depth of field, with a blurred background and sharp foreground. This is ideal for portraits, where you want the main subject to stand out from the background. A smaller aperture (larger f-stop number) is necessary when you want to create a deep depth of field, where both the foreground and background are in focus. This is useful in landscapes, architecture, and other scenarios where you want to show a lot of detail.


Shutter speed refers to the amount of time the camera’s shutter remains open, allowing light to hit the image sensor. It is measured in seconds or fractions of a second, such as 1/200 or 2″. A faster shutter speed (e.g., 1/1000) means less light can enter the camera, resulting in a darker image. Conversely, a slower shutter speed (e.g., 1″) means more light can enter the camera, resulting in a brighter image.


A faster shutter speed is useful in freezing action, such as in sports or wildlife photography, to capture sharp, clear images. A slower shutter speed is useful in creating motion blur, such as in waterfall photography, to show the movement of the water.


ISO refers to the sensitivity of the camera’s image sensor to light. The higher the ISO, the more sensitive the sensor is to light, resulting in brighter photos. However, the downside of increasing the ISO is that it also increases the amount of digital noise (grain) in the image.


Understanding Aperture


Aperture plays a crucial role in controlling the depth of field and exposure of an image, as explained above. It is also important to understand the effect of aperture on the image’s sharpness.


When using a wide aperture (small f-stop number), only a small part of the image will be in focus, while the rest of the image will be blurred. This is called bokeh, a term used to describe the aesthetic quality of the blurred background.


On the other hand, using a smaller aperture (large f-stop number) will result in the entire image being in focus, resulting in a sharper image.


Conclusion

Understanding exposure and aperture is essential for capturing great photographs. By adjusting these settings, you can create stunning photos that tell a story and evoke emotions. Knowing how to control exposure, depth of field, and sharpness will take your photography to the next level. Experiment with different settings, and don’t be afraid to make mistakes. The more you practice, the better you will become!


see all posts!

Title: Tips for Capturing Great Photographs: Experimenting with Depth of Field


Photography is a wonderful medium through which we can capture the beauty of the world around us. Whether it’s a stunning landscape, a portrait of a loved one, or an action shot of a sporting event, photography allows us to forever preserve these moments for posterity. However, capturing great photographs is not always easy, as it takes a combination of skill, patience, and creativity. In this article, we’ll focus on one particular technique that can help take your photography to new heights – experimenting with depth of field.


Depth of field is the distance between the nearest and the farthest objects in a scene that appear in sharp focus in a photograph. It is controlled by adjusting the aperture size, or the opening in the lens through which light passes. A larger aperture (represented by a smaller f-number) will create a shallower depth of field, resulting in a blurry background and a sharp subject. Conversely, a smaller aperture (represented by a larger f-number) will create a deeper depth of field, resulting in a sharp background and a sharp subject.


So, how can we use depth of field to create compelling photographs? Here are some tips:


1. Understand your lens: Different lenses have different ranges of apertures and maximum f-stops, which affect the depth of field. A prime lens with a wide aperture like f/1.4 or f/1.8 will produce a very shallow depth of field, while a zoom lens with a smaller maximum aperture like f/4 or f/5.6 will produce a deeper depth of field.


2. Consider the subject: Some subjects lend themselves better to shallow depth of field than others. Portraits, for example, often look best when the background is blurry, as it helps to isolate the subject and draw the viewer’s attention to their face. Conversely, landscape photography often requires a deeper depth of field to capture the foreground, middle ground, and background in sharp focus.


3. Experiment with different apertures: Don’t be afraid to experiment with different f-stops to see how they affect the depth of field in your photographs. Try taking the same shot at f/2.8, f/5.6, and f/16, and compare the results to see which one you like best.


4. Use manual focus: In some situations, the camera’s autofocus system may not accurately focus on the subject you want. Switching to manual focus can give you more control over where the camera focuses, allowing you to fine-tune the depth of field.


5. Pay attention to the background: When creating a shallow depth of field, it’s important to pay attention to the background to ensure that there are no distracting elements that can detract from the subject. Look for clean, simple backgrounds that complement the subject.


In conclusion, experimenting with depth of field is a great way to add depth and dimension to your photographs. By understanding how aperture affects depth of field, considering the subject, and experimenting with different settings, you’ll be able to create stunning images that truly capture the beauty of the world. So grab your camera and start exploring – you never know what stunning photos await!


see all posts!

Tips for Capturing Great Photographs: Creating Composition


Photography is not just about capturing images, but also about creating art. As a photographer, you need to go beyond just clicking the shutter button and think about the composition of your images to make them truly great. Composition can make or break a photograph. In this article, we will explore some tips and techniques to help you create great compositions in your photographs.


1. Rule of Thirds


The rule of thirds is a classic composition technique that has been used by photographers for years. The concept is simple, imagine your frame divided into a grid of nine equal parts, three across and three down. The rule suggests placing your subject either along the lines or at the intersections of these imaginary lines. This technique creates a visually pleasing image with a sense of balance and harmony.


2. Leading Lines


Using leading lines is another way to create a great composition in photography. Leading lines are lines that lead the viewer’s eye towards the subject of the photo. This can be anything from a road, fences, or even a simple diagonal line. These lines create depth and dimension in the image, making it more interesting.


3. Symmetry


Symmetry is another composition technique that can make your images stand out. It involves photographing your subject in such a way that the image is mirrored or reflected perfectly. Symmetry can add a sense of balance, calmness and order to your photographs. For example, you can take pictures of reflections on water.


4. Framing


Framing is an excellent composition technique that enhances the subject by using objects around it. You don’t need to have an actual frame in the shot. Instead, look for natural frames in the environment, such as trees, doorways, or arches. By using framing, you can create a sense of depth and a focal point in your image.


5. Depth-of-Field


Depth-of-field is a photographic technique where the photographer selectively focuses on a particular subject and lets the rest of the image fall out of focus. This technique can make the subject stand out and create a sense of depth in the photograph.


In conclusion, there are many ways to create great compositions in your photographs, from using the rule of thirds, leading lines, symmetry, framing, and depth-of-field. By combining these techniques, you can create stunning images that are not just photos, but a work of art. Remember, the key is to experiment and have fun with your photography. With these tips and techniques, you’ll be well on your way to capturing great photographs.


see all posts!

Title: Tips for Capturing Great Photographs: Choosing Interesting Subjects


Photography is an art form that involves capturing the beauty around us. Whether it be scenic landscapes or spontaneous moments, photography has the ability to capture emotions, memories, and stories. However, for your photograph to be successful, it’s essential to choose an interesting subject. In this article, we will provide tips for selecting compelling subjects that will elevate your photography skills.


Tip #1: Look for Beauty in Everyday Life


One of the most significant mistakes that amateur photographers make is assuming that they need to go somewhere exotic to capture great photos. While exotic locations may offer breathtaking scenery, you can also take astonishing photographs in your everyday life. Look for beauty in the simple things around you, whether it be the way the morning light reflects on a building or a street full of vibrant colors. Finding beauty in the mundane is one of the essential skills that every photographer should have.


Tip #2: Think about Perspective


The way you capture an image can create a significant difference in how you portray your subject. Consider trying out different perspectives to create a unique and compelling photograph. Experiment with different angles and distances, try taking photos from different heights or getting up close and personal with your subject. By playing around with the perspective, you can elevate the photograph and make it more engaging for the viewer.


Tip #3: Capture People in their Natural Setting


Most people are comfortable around people they know and in their everyday environment. By capturing people in their natural element, you are more likely to get a relaxed and natural photograph. You do not need to have professional models to create stunning photographs, as everyone has an element of beauty in them that you can capture. People watching can also be a good way to find interesting individuals to photograph.


Tip #4: Pay Attention to the Details


It’s easy to focus on the primary subject of a photograph and forget the smaller details. However, the details can add an extra layer of visual interest to your photographs, so always pay attention to the surroundings. For instance, if you’re photographing a flower, focus on the texture of the petals, the color tones, and the shadows. Details are crucial in photography, so ensure that they are on your checklist when capturing your subject.


Tip #5: Get Out and Explore


Taking the time to explore new places can provide a unique experience for photographers. You can find hidden gems and photograph them in ways that have not been done before. Exploring new places also helps prevent the dullness that comes with taking photographs in the same locations all the time.


In conclusion, selecting an interesting subject is one of the critical elements of capturing great photographs. By following these tips, you can elevate your photography skills and create visually engaging images that evoke emotions and tell a story. Remember that photography is an art, and like any art, it requires creativity and patience to master. So grab your camera, head outside, and start capturing the beauty around you!


see all posts!

Tips for Capturing Great Photographs: Playing with Light and Shadow


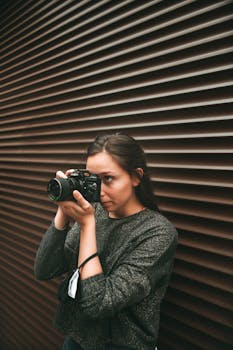
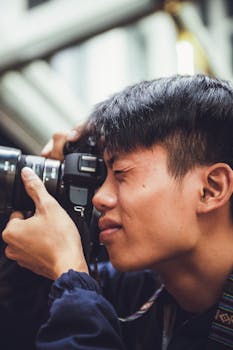
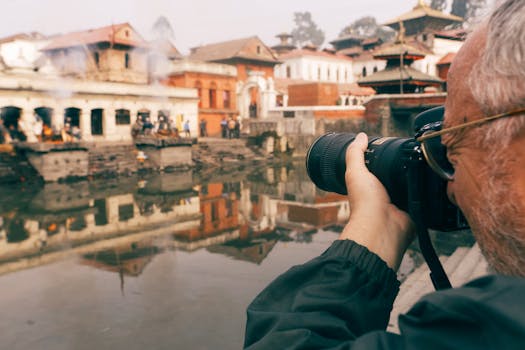
Photography as an art form is all about capturing light and shadow to create a visually stunning image. To take great photographs, one must understand the role that these two elements play, and the ways in which they can be manipulated for creative effect. In this article, we will discuss tips for capturing great photographs by playing with light and shadow.


1. Understand light


To capture great photographs, you must first understand the role that light plays in photography. Light is your most important tool as a photographer, and it is what creates the depth, texture, and dimensionality of your images. Understanding how to read, manipulate, and use light is key to taking great photographs.


2. Experiment with shadows


One of the most powerful tools a photographer can use is shadow. Shadows can add depth and contrast to an image, and can create the illusion of volume and space. Try experimenting with different types of shadows, such as soft shadows, harsh shadows, and long shadows, to add interest and texture to your photographs.


3. Use backlighting


Backlighting is a technique that can create stunning, dramatic images. This involves placing your subject in front of a strong light source, such as the sun, and shooting with the light source behind your subject. This will result in a backlit image, with the subject silhouetted against the light. This technique can create stunning images with depth, contrast, and the illusion of volume.


4. Explore natural lighting


Natural lighting is one of the most beautiful sources of light available to photographers. To create stunning images using natural light, you must first understand the qualities of natural light, such as its brightness, color temperature, and direction. By positioning your subject in relation to the sun, you can create images with depth, contrast, and texture.


5. Utilize artificial lighting


Artificial lighting can also be used effectively in photography. You can use artificial lighting to create a dramatic effect, or to add a pop of color to your images. Try experimenting with different types of artificial lights, such as strobe lights, softboxes, and reflectors, to create stunning images.


6. Master exposure


Exposure is crucial to capturing great photographs. A properly exposed image will have the right balance of light and shadow, with details visible in both the bright and dark areas of the image. To master exposure, you must understand the relationship between aperture, shutter speed, and ISO, and how they affect the amount of light that enters the camera.


7. Use depth of field


Depth of field is the amount of the image that is in focus, and is determined by the aperture setting on your camera. To create stunning images, try experimenting with shallow depth of field, where only a small portion of the image is in focus, or deep depth of field, where the entire image is in focus. This can create stunning images with depth, texture, and dimensionality.


In conclusion, capturing great photographs is all about understanding the role that light and shadow play in an image, and how to manipulate them for creative effect. By experimenting with different techniques, such as backlighting, natural lighting, and artificial lighting, you can create stunning images that will leave a lasting impression.


see all posts!

Tips for Capturing Great Photographs: Understanding Basic Camera Controls


Photography is an art that has the power to capture and preserve memories. With the rise of smartphones, anyone can take a photograph, but not everyone can capture great photographs. The key to capturing great photographs is understanding how to use your camera’s basic controls. In this blog, we will give you some tips on how to master them.


Shutter Speed

Shutter speed refers to the amount of time that the shutter stays open. The faster the shutter speed, the less time light has to enter the camera. This is useful for capturing fast-moving subjects, such as sports or wildlife. A slower shutter speed will allow more light into the camera, which can be used to create a sense of motion or depth in your images.


ISO

ISO measures the camera’s sensitivity to light. The higher the ISO, the more sensitive it is to light. This is useful in low light conditions, but it also comes with a trade-off: the higher the ISO, the more noise (graininess) will appear in your images. To get the best possible image quality, try to stick to the lowest possible ISO that still allows you to capture the shot you want.


Aperture

Aperture refers to the size of the opening in the lens that allows light into the camera. A smaller aperture (higher f-number) will result in a larger depth of field, which means more of the image will be in focus. A larger aperture (lower f-number) will result in a shallower depth of field, which allows you to blur the background and create a more dramatic effect.


Focus


Focus determines which part of the image is sharp and in focus. You can focus manually or use autofocus, which automatically determines the focus point based on the scene. If you are taking a portrait, it is best to focus on the eyes. For landscapes, it is best to use a small aperture for a larger depth of field.


Composition

Composition is the arrangement of visual elements in an image. It is important to consider the composition of your photographs to create visually appealing images. Use the rule of thirds, which involves dividing the image into thirds horizontally and vertically, and placing the subject off-center. This creates a more dynamic image.


In conclusion, understanding basic camera controls is essential to capture great photographs. Remember to adjust your shutter speed, ISO, aperture, and focus based on the scene and lighting conditions. Also, consider the composition of your image to create a visually appealing photograph. With practice, you will master these controls and capture stunning images.


see all posts!